
The Ground That’s Fighting Back
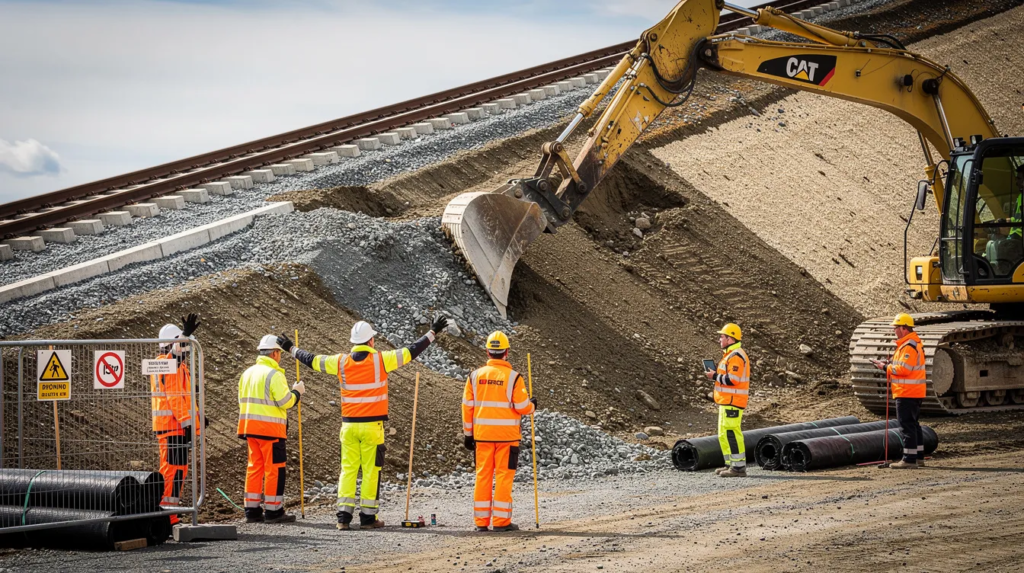
Not every piece of land is naturally suitable for building on. Look at a spot that seems solid and you might be in for a nasty surprise – the soil beneath can be shifting, swelling, collapsing and sliding in all directions. Give it the wrong treatment and the whole thing can start to crumble – buildings can fall, roads can become impassable and whole infrastructure projects can grind to a halt.
Take the thousands of homes that went up on London Clay in the 20th century, for example. They had shallow strip foundations which seemed fine at the time. But then came that scorching hot summer of 1976 and the ground gave way beneath them – literally. Buildings cracked and buckled, entire streets needed emergency repairs and it took twenty years for the clay to finally settle. And then the trees were cut down to save water and the clay began to swell all over again.
It was like the ground had never stopped moving in the first place. That’s the problem that engineers face every time they try to build on unstable soil. Whether it’s shrink-swell clay, loose sand, peat or made-up ground, that soil is always trying to outsmart the engineers and bring the whole thing crashing down.
What you need to know is that specialist earthworks and clever geotechnical design are what get the better of this soil type. And when those earthworks are done by proper UK civil engineers, who use the right earthworks services, then you can rest assured that your structure will be safe and solid for years to come. This article will take a closer look at the tricky soil types that engineers have to contend with, the way the failures happen, how to investigate them and the clever tricks that engineers use to stabilise and drain the soil – so its does what it’s told.
If you get it wrong – and it’s all too easy to do so – then the consequences are dire:
- Safety: buildings can fall down, and slope collapses and infrastructure failures can happen at any time\
- Cost: subsidence alone costs the UK economy over £400 million every year – and that figure is only going to get worse, reaching £600 million by 2050\
- Schedule: remediation can add months to the project timeline, causing all sorts of knock-on problems\
- Liability: if you don’t do things by the book, then you and your engineers can be liable for any damage that’s caused
What You Need to Understand About Unstable Soil – Our Hidden Enemy
When it comes down to it, unstable soil is simply soil that doesn’t know the meaning of the word ‘stable’. It’s soil that changes volume, loses its strength or just plain collapses when things change around it. It might be a change in the moisture levels, or a new load, or a terrific vibration – it doesn’t matter what it is. The fact of the matter is that unstable soil has a nasty habit of moving – and that can bring your whole project crashing down around your ears.
Civil engineers in the UK have to deal with all sorts of problematic soil types on a daily basis:
- High-plasticity clays: London Clay, Oxford Clay, Lambeth Group and Mercia Mudstone all have clay minerals that soak up water and swell up, then shrink when they dry out. These formations are all over south-east England and the Midlands.\
- Loose blown sands: found in East Anglia, coastal dunes and some valley deposits, these can collapse or liquefy when they get wet. BGS maps highlight the running sand hazard across superficial and bedrock deposits right across the UK.\
- Peat and organic deposits: the Fens, upland blanket bogs and estuarine muds are incredibly compressible, with very, very low shear strength – and they settle under load at an alarming rate.\
- Made ground: former industrial land, quarries and demolition waste can create weird mixed-up layers with no known history, all sorts of moisture levels and potential contamination.
Soil can behave in all sorts of nasty ways – shrink-swell cycles around foundations, liquefaction of saturated sands when they get shaken, collapse of fills when they get wet, long-term creep on soft slopes. And it’s all made worse by groundwater – perched water tables, artesian pressure in confined strata and rising water levels beneath excavations all reduce the effective stress and strength of the soil.
You can look at a perfectly solid bit of ground at the surface and yet find weaker layers lurking just beneath – at depths as shallow as 2-5m. And then you’ll need the services of earthworks services to get to the bottom of it – and sort it out. Typical earthworks work includes big-scale excavation and soil stabilisation – and on major infrastructure projects, you can be talking millions of cubic metres of material moved around.
Soil Mechanics 101: Because The Ground Can Be Pretty Mysterious
Soil is an engineering material that’s made up of solid particles and water and air all jumbled up together. How it behaves is governed by the effective stress principle – the strength and stiffness of soil depends on the stress carried by the particle skeleton, and the water pressure in the pores between all those particles reduces that stress. When the pore pressures go up – through water getting in, or being loaded too quickly, or just plain being blocked from draining away – then the strength and stiffness of the soil go down with it.
Drainage and Consolidation
Clays are really bad at letting water through. When a load is applied to the soil, it takes an age for the extra water to seep out, resulting in long term settlement that can go on for decades. Some UK embankments, built back in the 1960s and 1970s, kept on settling steadily for thirty years or more. And it’s the same with sands – but they behave differently, of course, responding rapidly to drained conditions, but under rapid or cyclic loading, they can liquefy in an instant.
Shrink-swell Mechanics
Clay minerals like Montmorillonite have layered crystal structures that let water molecules seep in between the layers and that causes them to expand. As the soil dries out, the process works in reverse and the clay shrinks back. Here in the UK, seasonal moisture cycles in clay soils cause vertical movements of around 10 – 50 mm over shallow foundations in open ground, and up to 80 – 100 mm near trees. And if you remove the roots, you can actually trigger a major heave years later as the clay slowly starts to rehydrate again. When excavated clay expands by 20 – 30% before you compact it, that is a pretty critical thing to bear in mind when you’re managing your fill volumes on site.
Loose granular soils
Loose sands and silts behave in a contractive way when they get saturated and get disturbed, losing their shear strength in no time. This is something that is directly relevant to vibro compaction and stone columns in modern earthworks services – where the process of densifying weak, crumbly ground can turn it into a solid, stable bearing layer.
Shear strength
Soil strength is all about the cohesion between the particles – the bonds between the clay particles – and the internal friction angle – which is all about how the grains interlock with one another. UK civil engineers use different factors of safety depending on what they’re doing, so for slopes and embankments they go for higher ones, and for foundations they go for lower ones, following the partial factors laid out in Eurocode 7.
UK Case Studies: When Unstable Soil Gets the Better of You
Soil failures aren’t just some abstract engineering problem. They cause real damage, insurance claims, evacuations and in extreme cases even derailments. Here are three examples that show what happens when the ground gets the better of you.
Shrink-swell clay and house subsidence
Back in the 1970s and 1980s, thousands of houses in south-east England with shallow strip foundations on London Clay ended up suffering from severe subsidence during the really dry summers. The foundations had not been designed to account for the moisture-driven volume changes, and so the houses cracked and tilted. The job of fixing them up, which usually involved underpinning to deeper, more stable strata, cost tens of thousands of pounds per property. And all of this work took months to do, with families having to be rehoused while the groundworks were carried out. It’s amazing what gets missed – the impact of the seasonal moisture cycles on clay behaviour and the need for deeper foundations or engineered earthworks to keep the structure away from the active clay.
Railway embankment failures
On December 27, 2012 a freight train derailed at Barrow upon Soar in Leicestershire, because the supporting embankment had failed. They found that there had been water in the embankment that had reduced its stability, but their monitoring systems had not picked up the risk. And if you look at the other side of the country further landslips at Dewsbury and Newton Aycliffe closed off sections of the rail network and that brought a team in to do some urgent earthworks services – including a 9 m deep sheet piled wall, 2,500 tonnes of compacted fill and 24 hours a day working to get the track back up and running. This country’s approximately 9,660 km of embankments on the rail infrastructure are an annual maintenance burden of around £90 million just for the rail earthworks, and when they do go wrong it is pretty costly to put right.
Housing on poorly compacted made ground
There are low-rise housing developments in the Midlands on former quarry and landfill sites that have had settlement and tilting where fill was not classified and compacted properly. If you get the earthworks wrong, you can add six figures to your project costs when you have to go back and clear up the spoil, or when you have to do some underpinning work. Prevention through proper investigation, right material classification and some controlled compaction is always cheaper than cure. And earthworks are used for land grading and slope stabilisation too, so if you don’t get it right on brownfield land, then you’re cutting corners.
From Desk to Field: Site Investigation as the First Line of Defence
No civil engineer would design foundations or do major earthworks without a ground investigation that is compliant with BS 5930:2015 and Eurocode 7. And that is the first line of defence against the unexpected.
Desk study and walkover
You start at the desk: reviewing old maps, the Coal Authority, BGS geology data, past land use and flood risk mapping. Site clearance records, past demolition and anything in the local authority files about old quarries or waste disposal all get fed into the picture. Then you take a walkaround to see if there are any visible signs of instability – cracks in existing structures, slip scars from the past, wet patches and vegetation patterns. You take topographical surveys to get the existing ground levels and that gives you the accurate data before you start moving any earth. And that’s when you prepare the site, removing the vegetation and stabilising the soil where the walkaround identifies risks.
Intrusive investigation
- Trial pits and window sampling: for shallow strata and made ground, usually to 1-5 m depth
- Cable percussion and rotary boreholes: for deeper strata, with in-situ tests such as the Standard Penetration Test (SPT) and Cone Penetration Test (CPT)* Laboratory testing: Atterberg limits, and all that sort of thing – oedometer consolidation, triaxial shear tests, sulphate and organic content analysis, you know
What the data actually delivers
So when the investigation data comes back, it feeds straight into those geotechnical risk registers, and that earthworks material classification under SHW Series 600, and what have you. And then you start getting on to picking the stabilisation and drainage strategies. The materials get graded, plasticity and all that, and moisture content, and that sort of thing – and you can just about tell whether you can re-use the excavated soil or whether it’s off to the tip it goes. And the quality of that initial investigation – that’s really what determines how site ready the platform can be made, and how robust the earthworks design is going to prove.
Designing Against an Unstable Subsurface: Getting the Ground to Cooperate
Geotechnical design is more like a battle plan, really: getting the variable, sometimes hostile ground to behave itself. You’ve got to match the design to the ground, not the other way around
Choosing the right foundation
Foundation support involves digging down and making concrete footings that safely transfer loads down to the competent strata – that is to say the good stuff. It’s a choice between shallow foundations (strip, pad, raft) and deep foundations (piles, piled raft) – and that really depends on the strength and compressibility of the soil. Raft slabs are often used to bridge over local weak spots, or to deal with differential movements on made ground – while piles just by-pass the poor surface soils altogether.
Designing the earthworks
Cut and fill is about balancing the earthworks, so that you don’t need to import a load of aggregates or dig up a lot of soil to get rid of. Balanced earthworks are cost-effective, and prevent you having to import muck, or export it off site. The engineer then specifies the formation levels, acceptable materials and compaction criteria – all in line with the UK Specification for Highway Works (Series 600 and 800). Building an embankment involves depositing and compacting soil to raise the ground level – while grading is about smoothing and levelling the land to get it to the right slope or contour. And then there’s the drainage management, which involves designing the slopes to get the water to run off away from the structures – or building retaining structures to hold back the water, or stabilise the slopes that are prone to erosion.
Slope stability
Slope stability – that’s a biggie. Usually you use limit equilibrium or finite element methods, applying partial factors from Eurocode 7 – just to make sure you’ve got a good enough factor of safety for the road and rail embankments. And then you’ve got to take into account both the short-term (undrained) and long-term (drained) conditions – when it comes to construction works on slopes.
Coordination
Good design needs collaboration between the structural designers, the geotechnical specialists, and the contractors who are doing the earthworks. Design reviews at RIBA Stages 2-4 make sure the ground conditions are properly feeding into the build at every stage – and if conditions change, the team needs to be ready to change the approach.
Taming Water: Dealing with Drainage, Dewatering and Moisture
Uncontrolled water is the biggest driver of soil instability, especially when you’ve got a rainfall-dominated climate like the UK. Every earthworks project needs to manage water aggressively
Permanent drainage
- Perimeter and toe drains for embankments and cuttings
- French drains around buildings, and land drains under slabs
- And then there’s surface water management through swales, detention basins and SuDS features – all to prevent erosion and saturation of slopes
Temporary works
During construction, well-point dewatering systems are good for shallow sandy excavations – while deep wells and sump pumping are better for basement works in high water-table areas. Cut-off trenches can help intercept perched water running into cut faces. And when it comes to trenching for underground services, you’ve got to be careful not to create drainage paths that destabilise the adjacent ground.
Moisture conditioning
When you’re storing stockpiled soils, you’ve got to make sure they’re either air-dried, or wetted – to bring the moisture content within the specified limits before compaction. And then to protect the formation from rain damage between construction phases, you can top it off with geotextiles or impermeable layers.
Designing for the future
Climate change projections are a thing now. BGS GeoClimate data suggests that under a high emissions scenario, up to 54% of properties in London could be at high risk from shrink-swell by 2070 – that’s around 2.5 million homes. So engineers need to start over-designing drainage, compared to mid-20th century practice – and plan for even more intense rainfall events.
Soil Stabilisation: Upgrading Weak Ground
Stabilisation is a core tool in modern earthworks – it allows you to upgrade weak or wet soils in-situ, rather than having to excavate and replace them at great cost
Chemical methods
- Lime stabilisation : reduces plasticity in clayey soils, improves workability and early strength gain. UK practice goes back to the 1980s, with typical curing times of at least 72 hours after mixing. But you have to take account of sulphate content – as high sulphate soils can lead to nasty ettringite formation.
- Cement or lime-cement stabilisation : used for capping layers on highways following DMRB and SHW guidance – it creates a robust platform for the next phase of construction
Mechanical methods
- Geogrids and geotextiles : provide reinforcement and separation in road embankments and working platforms for cranes and piling rigs
- Stone columns and vibro replacement: making the most of loose sands and granular fills by densifying them and boosting the bearing capacity of the ground
- Dynamic compaction: massive fill embankments can be compacted mechanically to ram the soil down, making it denser and able to bear loads better
Choosing the Right Approach
The type of soil, moisture levels, sulphate content and environmental factors all play a role in deciding which stabilisation method to go with. Bringing in quarried aggregates is a major contributor to greenhouse gas emissions, and stabilising the materials already on site is usually the more efficient and cost-effective option. Even in areas with sloping, clay-rich ground, terracing can create beautiful, functional garden tiers by literally cutting steps into the land. In the UK, brownfield sites have seen the benefits of chemical stabilisation with clients getting their land up to site-ready status in a matter of weeks – without having to export tonnes of spoil or fork out for waste disposal.
Compaction and Quality Control: Locking Down the Ground
Even good quality soil will behave badly if it is laid in thick, poorly compacted layers. And that’s where controlled compaction comes in – the secret to giving the ground its engineered strength. When it comes to earthworks services, the machinery really earns its keep during this phase.
Key Principles
| Parameter | Typical Specification |
| Layer thickness | 150-300 mm per lift |
| Target density | 95-100% of Maximum Dry Density (MDD) |
| Moisture content | Within ±2% of optimum (Proctor test) |
| Roller passes | 4-8 depending on material and roller type |
Compaction equipment and plant
You need the right kit for the job – smooth-drum rollers are great for granular materials, but padfoot rollers are better suited to clays and moist soils. Vibrating plates and trench rollers are perfect for the tight, confined spaces where services are buried. And on big projects like motorways or airports, GPS-guided compaction systems make sure the job gets done properly. The typical fleet on a major earthworks project will include a dozer, an excavator or two, some dump trucks and tipper lorries – all driven by experienced hands to ensure the job’s done safely and efficiently. An excavator will be used to cut out high areas and get rid of them, while the dump trucks will transport the material to the fill zones.
Quality Control
- In-situ density tests (that’s sand-cone and nuclear density gauge)
- CBR testing for road and pavement subgrades
- One layer at a time, checking it meets the SHW and local authority specs before moving on to the next
If the job’s not done properly, post-construction settlement can start to cause problems – like pavement ruts, slab cracks and service failures. And guess what? remedial works once the structure is up can cost a small fortune more than doing it right in the first place.
Civil Engineers and Earthworks Services: Who Does What on Site?
A successful earthworks project needs clear roles and a tight team effort between civil engineers and the earthworks services contractor.
Design Team Responsibilities
- Investigating the site, designing the earthworks and classifying the materials
- Writing the earthworks specs and designing the stabilisation mixes
- Making sure the structure will be stable and not sink – or rattle and shake like a house of cards
- Figuring out what monitoring needs to be done and how to trigger the right actions
Contractor Responsibilities
- Planning the sequence of cut and fill, managing the plant and haul routes – it’s like a big game of Tetris
- Implementing drainage, stabilisation and compaction
- Testing and documenting to meet the project requirements
- Managing the supply of imported materials, getting rid of the spoil and hiring any specialist plant needed
Collaboration in Practice
Before the project gets underway, the team gets together to agree on the risk allocation, the programme and the seasonality of the work. If it’s going to be a big project, the best time to start is when the weather is dry – otherwise things can get messy. But planning for float is essential – you know, for when the weather just doesn’t cooperate and the ground happens to be a lot softer than the boreholes said it would be.
Under NEC and JCT contracts, the allocation of risk for ground conditions is a common point of contention. But one thing’s for sure – if you follow the CDM regulations, you’ll be keeping your site workers safe in deep excavations and steep slopes.
If you’re getting in some extra hire services to provide specialist compaction equipment, you need to make sure the operators are up to scratch and the plant is suited to the soil types on site.
Quality earthworks services can turn tricky plots of land into viable commercial developments that would otherwise go unsold, unlocking value in constrained urban or brownfield sites that might as well be in a bad dream.
Technology in Modern Earthworks: From GPS to 3D Modelling
These days, earthworks is all about data and technology – and it’s creating new ways to manage unstable soils and complex platforms.
Digital Ground Models
3D ground models built from LiDAR, drone surveys and borehole logs allow engineers to visualise the soil layers and spot any potential weak zones before a single shovel-full of earth is moved. Software can calculate cut and fill volumes with pinpoint accuracy, using triangulated irregular networks that used to take days to compute by hand. Drone surveys can cover hundreds of acres in a single day, delivering topographical data that maps the existing ground levels for site preparation.
GPS Machine Control
Modern machinery is equipped with GPS, so you can track exactly where each machine is, and how many passes it needs to make.GPS machine control is a game-changer in terms of earthworks accuracy, allowing dozers and excavators to get to design levels without needing constant manual surveying. The improvement in accuracy is impressive – down to 10-20 mm – which translates to a lot of efficiency gains: fewer survey pegs, less time spent on the job, and far less rework in the process
Monitoring What’s Going On
On any critical structures, you’ve got a range of tools at your disposal: inclinometers, piezometers, settlement plates and automated total stations all providing real-time data as it happens. When a slope or embankment starts getting beyond safe levels, you can trigger alerts to take preventative action before disaster strikes. And with Satellite InSAR offering a way to spot ground movement over a wide area, and machine learning helping to predict the risk of shrink-swell and soil movement based on a mix of climate and soil data – you’ve got a powerful toolkit there
Of course, technology is no substitute for engineering judgement – it’s just a way to amplify the capabilities of civil engineers in the UK to manage even the toughest ground conditions at scale, and support better decision-making across every phase of a project.
Planning a Project on Tricky Ground: What Clients Need to Know
If you’re in a position where you’ve got land that’s either got known unstable soils or you suspect might, then you need to take a few key steps to manage your risk and keep things on track.
- Get a good look at the ground before you finalise anything: do a desk study and a walkover with a geotechnical consultant before you even buy the land or sort out planning. And take your engineer along with you – don’t be afraid to talk about your concerns and get a feel for the site.
- Be realistic about your budget: on clay or brownfield sites, earthworks, drainage, investigation and stabilisation costs can add up to a big chunk of your project budget. So don’t assume good ground – factor in a contingency instead.
- Pick a contractor who knows what they’re doing: look for an earthworks services provider with a track record on similar soil types and project scales. They should be able to do testing, document their work, and adapt to any changes that come up. You’ve got plenty of options across the UK – from large infrastructure firms through to specialist groundworks contractors who can offer end-to-end services from investigation support through to final compaction – its all becoming more common
- Plan for the worst, and work out how to adapt: schedule your earthworks for when conditions are best, and use risk workshops and geotechnical risk registers to make sense of the unexpected. Leave some time in the calendar for stabilisation to take effect before starting the next phase.
Conclusion: Taming the Unpredictable Ground
Ground doesn’t behave, it swells and shrinks and moves in ways you can’t always anticipate. Pretending it does, though, is the most expensive mistake you can make in construction. But with well-planned investigation, thoughtful design, and some competent earthworks services on your side, even the most hostile soils can be tamed – and what gets built stays built.
The key to success is collaboration. You need knowledgeable civil engineers working together with specialist contractors and clients who are informed and curious to make it happen. None of the methods mentioned here are one-off fixes, just part of a strategy that has been refined over years of building on tough ground.
Some key takeaways for any project:
- Assume nothing about your site – investigate before you start designing
- Spend early on understanding soil behaviour and groundwater. It’s a fraction of the cost of failure if you do
- Drainage, stabilisation and compaction are just a few tools in your kit – use them as part of an integrated plan rather than an afterthought
- Recognise the impact of climate change – more intense rain and deeper moisture cycles are already changing the risk landscape
- Keep an eye on things over time – the ground doesn’t stop moving just because construction is finished
From London’s deep clays to the reclaimed land of the Humber, the UK has a century or more of experience in building on difficult ground. And while the basic principles remain the same, modern practice – bringing together clever engineering with all the latest technology – is helping to reduce risk and stop the ground from getting the better of you.