
The Cost of Getting Site Preparation Wrong in UK Civil Engineering
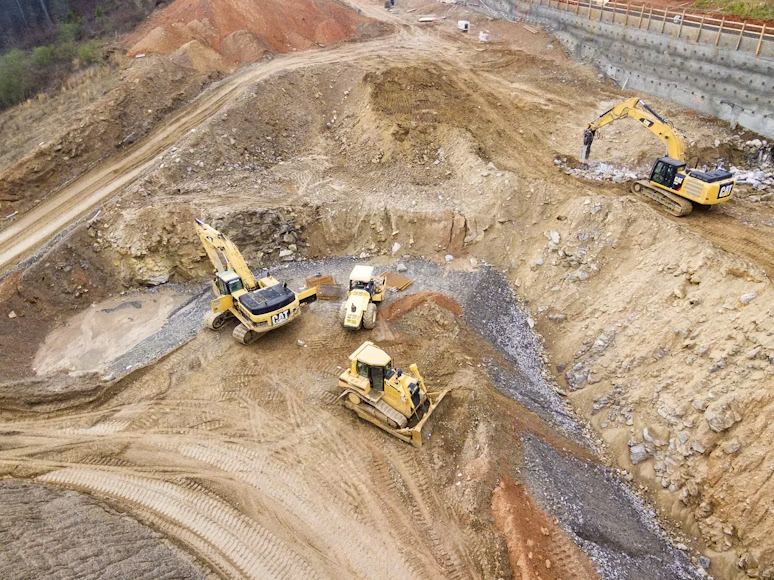
If you’ve spent any time running civil engineering projects in the UK – think roads, rail, bridges, schools, utilities – then you’ll know exactly where most projects go off the rails. More often than not it’s not a design issue that’s been spotted too late in the day. It’s usually something that should have been picked up, sorted out, or anticipated right from the get go – long before the first brick was even laid. Dodging site preparation is a recipe for structural problems and delays, and by the way, the evidence across the UK sector is pretty damning.
Why a Good Site Preparation is Key to Project Success
Let’s cut to the chase here. Proper site preparation is essential for construction project success – not some nice to have or just another line item to hack when budgets get tight at the feasibility stage. In UK civil engineering, site prep is the first and most crucial step in delivering a project on time and in budget: getting a grip on ground conditions, clearing out the site, taking stock of it, planning access, sorting out the drainage and erosion controls, and getting your hands on the right equipment so you can start building on a safe, stable, well-drained, accessible bit of ground. In fact, proper site preparation is probably the single biggest factor that determines whether your construction project will actually get finished on time and on budget. Every major public sector client in the UK – Highways England, HS2, Network Rail – regularly points to hidden ground conditions, utility conflicts, and ecology constraints as the top sources of disputes and variation claims. And guess what – all those risks essentially boil down to how well you’ve prepared the site.
Consider a scenario like this, which plays out more often than you’d think on UK schemes: a road widening project where dodgy ground investigation fails to spot the soft spots just beneath the proposed pathway. What could have been a simple earthworks and surfacing job turns into months of redesign, ground improvement, and getting the project back on track. And the overall success of the whole project is basically put at risk – not because of some poor engineering – but because the preparation was just plain bad.
This article is going to walk you through the key bits of any good construction site preparation – from site investigation and surveys, on through to site clearing, drainage installation, and all the rest – so you can build a site preparation plan that really will reduce delays, redesign, disputes, and that old chestnut – reputational damage. Whether you’re a project manager putting in a £2m utilities bid, a contractor sorting out resources and compliance on site, or an engineer delivering a £50m highway contract – the principles are the same.
What We Really Mean by “Proper Site Preparation”
Site preparation covers the period between getting outline design or planning permission and actually breaking ground. It’s the phase where you move from the drawing board to the real world: doing the surveys, site investigation, all the enabling works, temporary works, logistics setup. It’s where you get the land sorted and create space for what comes next.
But the difference between just checking the boxes and really thorough site preparation is huge. Just ticking off the boxes might satisfy the planning condition or get you a basic desk study. But proper site preparation really digs deep into ground conditions, finds all the underground services, plans access in a way that really works, addresses ecology and environmental constraints, and tries to anticipate the problems before you even start building. A well-prepared site makes construction safer and more efficient, and it gives every trade that follows a safe clear area to work in.
Civil engineering schemes carry a different scope to your run-of-the-mill house builds. Highways jobs need Section 278 works, for example. Rail projects need Network Rail possession windows and flood defence works need Environment Agency and Lead Local Flood Authority approval – and the aim is always the same: to end up with a site that’s safe, stable, well-drained, and fully accessible – a building site that won’t spring any nasty surprises on you halfway through the programme. Proper site preparation minimises the risk of structural issues and helps you avoid costly mid-project redesigns.
So what’s always a must on a UK civil site prep?
- A proper desk study, walkover survey, and some intrusive ground investigation (boreholes, trial pits, lab testing)
- Utility mapping (those statutory undertaker plans, PAS 128 surveys, GPR verification)
- A topographical survey tied to Ordnance Datum, with boundary verification thrown in
- Ecology surveys (all about protected species windows, nesting birds, bats, newts) and environmental permits
- Access and logistics planning: haul roads, traffic management, delivery routes
- Drainage design – both temporary and permanent – plus erosion and silt controls
- Enabling works: clearance, demolition, removal of existing structures, hazardous material handling
- Temporary works design, site compounds, welfare, security
Site prep is about clearing, grading, and soil testing – but on a civil engineering scheme the scope is way broader than that short list suggests.
How Much Does Getting It Wrong Cost?
When site preparation falls short the financial consequences are immediate, and you can see exactly where the money’s going. Site prep reduces the likelihood of costly delays – but only if you get it right. Here’s where the money goes when you don’t:
- Re-design and Re-do fees. If the state of the soil or groundwater is worse than you assumed, you might end up ripping out shallow footings and putting in piled foundations. Or you might need to start from scratch. If you didn’t do a thorough job of investigating ground conditions in the first place, you could end up with a structural failure on your hands – not to mention a redesign bill that’s just a small part of the overall cost. On a big project, the cost of re-designing can end up running into hundreds of thousands of pounds.
- Ground Improvement Works. If you find unexpected soft spots, or high water levels, or peat, you might need to slap in unplanned piling, ground replacement, lime stabilisation, or stone columns. That adds both time and cost. In one case, there was a NEC Option C contract that had to deal with a sulphate-rich ground condition – and the extra cost came out at £343,000 on a £7.4 million contract – plus a three week delay.
- Extended Preliminaries and Standing Time. Plant and labour just sitting around waiting for you to clear obstructions, map out the utilities, or get some approvals. On one mixed-use development in Bristol we were working on a former industrial site, and the estimates for enabling works ranged from £180,000 to £320,000 – and then we found asbestos and uncharted utilities, which added 20-50% to the bill.
- Compensation Events and Variations. Under the NEC contracts, if you encounter conditions that an experienced contractor wouldn’t have reasonably foreseen, it triggers a compensation event – which can lead to all sorts of disputes and costs. Under JCT, the contractor usually bears all the ground risk unless the contract has been specially amended. Either way, it’s a recipe for eating up time and money – like the case in Bridgend where we found unexploded ordnance on site – and because ground risk wasn’t allocated in the contract, the contractor under JCT DB 2016 didn’t get any extra time or payment.
- Profit Erosion on Smaller Projects. On a £1-2 million building project, making one wrong assumption about the soil or utilities can wipe out your entire profit margin. If you thought you could get away with shallow foundations, but actually need piling, that’s an extra £50,000 to £200,000 on a project that’s not exactly swimming in cash.
- Infrastructure Damage. Poor drainage or erosion control lets water get in and damage the sub-base, a neighbouring road, or some adjacent land – which means you have to spend extra to fix the defects, clean up the mess and maybe even pay some fines.
Foundation failure remedial costs on UK sites are a regular occurrence, costing between £50,000 and £200,000. And that’s money that could have been avoided.
The Hidden Programme & Productivity Impacts
Even when the costs aren’t immediately staring you straight in the face on a cost report, poor construction site preparation can quietly eat away at productivity and start causing programme drift. Early defects – lousy access, bad drainage, unknown ground obstructions – make it impossible to keep things running on schedule. The trades start tripping over each other. Materials get handled twice. The plant just sits there.
Imagine a project by a uk civil engineering company that’s supposed to take 30 weeks. The first month rolls around and the enabling works still aren’t done: the access track isn’t built, the utilities are running late, and – oh no – there’s unexpected groundwater. That job now looks like it’s going to take 40 weeks. The resources either just sit idle or they get moved to another project. The weather gets worse. The whole project programme starts to unwind.
Some of the productivity drags you see on UK sites that look all too familiar include:
- Plant sitting around waiting for the ground to dry or for the temporary drainage to be installed – especially when that happens in the middle of a wet February or March.
- Workers not being able to get on with the job because the foundation or sub-grade isn’t ready yet.
- Access issues forcing you to use smaller vehicles or longer haul routes, which reduces the number of deliveries per day.
- The trades can’t follow the planned sequence – for instance, you should do the drainage first, but the earthworks get squeezed into a wet spell.
- Muck-away delays: spoil piling up on site and needing multiple handling operations.
- Under-designed haul roads collapsing under the delivery wagons, creating a winter mud-bath.
Each of these issues just gets worse, like a snowball rolling down the hill. A one-week delay in month one turns into a three-week delay by month four.
Regulatory, Legal & Reputational Fallout in the UK
Inadequate site preparation isn’t just about money on the specific project – it also exposes you to regulatory action, expensive legal disputes, and lasting reputational damage.
The permitting and environmental assessments are a must for getting the necessary compliance, and getting them wrong or ignoring them altogether carries serious consequences:
- Environment Agency enforcement. Under the Environmental Protection Act 1990 (Part IIA), failing to deal with contaminated land properly can get you prosecuted, a restoration notice, and significant fines – and the EA’s enforcement and sanctions policy includes permit revocations and stop-notices for environmental offences.
- HSE notices. Working near live services, unstable excavations, or contaminated ground without adequate controls can trigger an improvement or prohibition notice.
- Planning enforcement. Not following through on the planning conditions – for instance, not putting in the erosion controls that were specified in the Construction Environmental Management Plan – can lead to enforcement action from the local authority.
- Boundary and rights-of-way disputes. Poor site investigation and planning can lead to encroachment on neighbouring land, damaging boundary lines, or blocking access routes – which can trigger costly party wall disputes.
- Reputational Damage – being at the receiving end of an EA prosecution or a string of HSE enforcement notices can land you a one-way ticket out of local authority frameworks and pre-qualification lists. Let alone on a big-ticket project, that sort of taint can cling to you for years to come.
Key Steps for a Solid Construction Site Get-Ready
Before we dive into each of these steps, here’s the plan of attack. Think of this as your site preparation checklist – something that every UK civil engineering project should tick off, no matter what
- Site investigation (getting the lowdown on the ground with a desk study, a walkover, and some actual digging)
- Site surveying (getting a lay of the land – topographical, boundaries, utilities, and all that jazz)
- Site planning (laying out the compound, making space for storage, welfare, and access)
- Designing and protecting access points (haul roads, traffic management, and turning bays)
- Site clearance and enabling works (demolition, clearing the undergrowth, hazardous materials, and utility diversions)
- Installing drainage and surface water management (temporary and permanent solutions)
- Eroding less of the surrounding landscape and protecting the environment (a bit of a no-brainer, really)
- Getting the ground into shape (graders and compactors will do the trick)
- Figuring out which kit to bring in (equipment selection and plant strategy)
- A bit of safety planning and making sure you’re doing your CDM compliance right
Short-cutting any of these steps is where costs and risks start to creep in. The order might vary depending on whether you’re churning out a new high-rise in the city or building a highway on open ground, but the principles apply to just about every construction site.
Site Investigation: The Cheapest Insurance Policy You’ll Ever Buy
If there’s one place where shelling out a bit more upfront can save you a king’s ransom later on, it’s the site investigation. This is all about getting a handle on the soil and groundwater conditions on the site. And it’s that data that dictates just about every decision that comes next.
The UK’s BS 5930:2015 makes a pretty clear point: it’s chump change compared to the overall cost of the project, but a thorough site investigation can save you a load of hassle down the line. And that’s not just the word of a bunch of suits in an office – Eurocode 7 (BS EN 1997) makes the same point in spades.
Getting the results of soil testing is pretty crucial when you’re building anything. You need to know if the soil can take the weight of the structure, and exactly what kind of foundation you need to build. Soil testing will tell you all that – it’s a non-negotiable part of any site prep plan
Here’s what a decent site investigation should include:
- A desk study: historical maps, geological maps, contamination records, and where the groundwater is coming from
- A walkover: visible features, hazards, access constraints
- Intrusive investigation: making holes in the ground (boreholes and trial pits), collecting samples, and getting the ground tested
- Laboratory testing: finding out what the soil is like, if it’s stable, and if there’s anything dodgy lurking in it
- Deliverables: a write-up of the whole process, the results of the testing, and some recommendations for the design of the thing
There’s a few common mistakes UK construction pros make with site investigations that you really should steer clear of:
- Relying on a desk study and not actually taking the plunge with a few trial pits or boreholes
- Not spacing those boreholes out enough or not going deep enough
- Putting in the investigation too late – after the tenders have been sent out and the contractors are already bidding
- Not testing for chemical contamination early on – missing all that asbestos in the soil is a real nasty
- Not factoring in seasonal changes in the groundwater
Think of it this way: if you find out during your desk study that there’s a lot of groundwater or some peat lurking around, it’s a few grand to investigate it properly. If you find out when the piling rigs are on site, you’re looking at tens of thousands (or more) to re-design and re-plan.
Site Surveying: Finding Your Boundaries
Site surveying is the bit where you figure out where the boundaries are and whether you’re complying with the zoning laws. It’s basically the bit where you tie what you’re designing to the real world.
A proper civil engineering team should be making sure their surveyors are doing the following:
- Topographical survey: get the site’s contours and height levels all charted out
- Boundary verification: check that the site’s boundaries are as they should be against the Land Registry plans
- Underground utility mapping: get all the utilities mapped out to PAS 128 standard. That means starting with the statutory plans, then using GPR (ground-penetrating radar) or vacuum excavation if you really need to find out what’s going on
- Existing asset survey: chart out all the existing structures and features on the site
You can’t stress enough how hairy it is to not have a clue where all the existing services are. They can cause power outages, injury, and prosecutions – not to mention wasting a load of time and money.
From Site Investigation to Smart Site Planning
Good site planning takes all the data from site investigation and surveys and turns it into something you can actually build with. And that’s where the real magic happens
Setting up the temporary infrastructure makes construction logistics a lot easier. Your site plan should make sure you’ve got space for storage, welfare, and all that other essential kit, and that it’s not in the way.
Getting compound and welfare locations right is pretty key – they need to be easy to get to, without blocking off the main haul routes or annoying the neighbours
- Material storage zones – keeping stockpiles away from drainage routes to cut down on double handling, and because nobody likes a flooded site
- Laydown areas and crane positions – all guided by reliable ground bearing capacity from your GI data to stop the ground from sagging under the weight of your plant
- Temporary drainage – they’re not just for keeping water out – they help manage the site’s water situation so you don’t end up with a big pond in the middle of the site
- Access for emergency vehicles, regular deliveries, and abnormal loads – get it right from day one and you’ll avoid a lot of headaches further down the line, especially when the weather turns
- Phase planning – on highways or rail jobs, this means keeping the haul roads in good nick during winter, making sure handovers are phased so they don’t clash, and working with possession windows to keep things running smoothly
If you’re running a large site with multiple phases, you need to think about how the site is changing over time – because that haul road that’s fine in June might be impassable by December without proper maintenance and drainage.
Designing and Protecting Access Points
It’s pretty critical you get your access points right from the start – programme, safety, neighbour relations all rely on it. Get it wrong and you’ll be fighting fires for weeks.
In the UK, there are plenty of issues that can trip up projects:
- Narrow residential streets where 44-tonne lorries can’t turn without damaging the kerb or the bins
- School traffic creating delivery windows that are tighter than you’d like
- Section 278 works that take longer than expected to hammer out with the local highways authority
- Traffic management plans that aren’t properly coordinated with utility works or phased closures
When you’re thinking about the physical design, consider:
- Temporary haul roads that are properly built with geotextile and stone to handle heavy machinery in the rain
- Turning circles that are big enough for your largest vehicle
- Wheel wash facilities to stop mud getting on the public roads – because nobody likes a complaint from a local
- Temporary signage and lighting to keep pedestrians safe around the access areas
If you don’t get access planning right, you’re looking at vehicle damage, reversing hazards, delayed deliveries, formal complaints from residents, and probably job delays as well.
Site Clearing, Demolition & Enabling Works
Site clearing isn’t just about clearing the trees and debris – it’s about clearing the way for construction. And on a civil engineering job, that means getting the site cleared and ready for the real work to start.
What does a thorough site clearing involve?
- Vegetation clearance – but watch out for those ecology windows – you’ve got a legal duty to protect nesting birds in the summer, bats all year round, and great crested newts when they’re active. Get it wrong and you’ll be stuck
- Existing pavement breakout and demolition – get rid of the old stuff and make way for the new – old foundations, redundant services, underground wreckage
- Hazardous material removal – and watch out for asbestos – older infrastructure is a minefield and overlooking it can blow the budget and programme. Remove it properly with the right contractors and all the necessary safety precautions
- Utilities diversions – get on the phone to the utility companies early to divert the gas, water, electric, and telecoms services before the main works start
- Waste management – get it right – duty of care transfers, waste transfer notes, proper classification are all non-negotiable
Smart enabling works packages consolidate all the early bits – utilities diversions, hoarding, initial earthworks, and contamination remediation – into a single contract. Don’t leave them piecemeal, and you’ll save yourself a lot of hassle further down the line.
Drainage Installation & Surface Water Management
Getting your drainage sorted early and controlling surface water is a must – it keeps the site and the surrounding infrastructure safe. Don’t get it right, and you’ll be fighting a losing battle for the rest of the programme.
Site grading is a must – it prevents water pooling and ensures proper drainage around buildings and other structures. Without it, you’re asking for trouble.
So what do you do on site?
- Temporary ditches and cut-off drains around the excavations to stop surface water reaching the working areas
- Sump pumps and dewatering where the ground is wet – make sure they’re sized for the worst-case flow, not the average
- Early installation of permanent drainage where the design allows – get the drainage capacity sooner and reduce temporary works
- Attenuation and flow control to manage runoff rates, especially if you’re working in an area that requires Sustainable Drainage Systems
- LLFA (Lead Local Flood Authority) engagement – in many places, you’ll need their approval for the surface water management strategy before you even start
Don’t get your drainage wrong, and you’ll be looking at flooded excavations, damaged sub-base materials, bogged plant, and delayed concrete pours – and in areas like Wales and the North-West, a week of rain can set you back months.
Erosion System Controls & Environmental Protection
Erosion control is a must on UK civil engineering sites – especially those near watercourses, on slopes, or with big earthworks. It’s not just about preventing soil from running off – it’s about keeping the site safe and stable.
In the UK, erosion system controls are absolutely mission-critical.
So, what do you need to do to keep it under control?
- Erosion fencing – put it up to stop the soil from washing away
- Siltation ponds – get the silt out of the watercourse before it’s too late
- Sediment control – make sure the soil doesn’t get washed away from the site
- Vegetation and geotextile matting – plant some stuff and put some matting down to stop the soil from washing awayUn-protected earthworks let fine silts get washed off-site during rain, which then pollutes streams & drains. The Environment Agency takes this very seriously . Silt pollution in a local watercourse can trigger some pretty serious consequences – enforcement action, fines, and permit revocations. When it comes to embankment works along rivers or coastal defence projects, the risks of not having good erosion control in place are enormous – both for the environment and for the bank balance.
Key control measures for construction sites in the UK:
- Silt fences go in downslope of exposed earthworks, checked & maintained after every big downpour
- Sediment traps & settlement ponds at site outfalls to catch suspended solids before water leaves the site
- Straw bales & temporary swales to slow down & clean up surface water running across exposed ground
- Stabilised site entrances with stone & geotextile to stop vehicles tracking mud & sediment onto public roads & into drains
- Monitoring responsibilities get clearly assigned – someone’s gotta check controls after rain, maintain them, & keep track of compliance
Planning for erosion controls is now expected in Construction Environmental Management Plans (& by big public-sector clients). If your CEMP doesn’t have a detailed erosion & sediment control plan in it, you’re not going to win any big frameworks.
Ground Improvement, Grading & Compaction
The final bit of site preparation before you start building is getting the ground ready. And that’s your last line of defence against the foundations collapsing, or the roads rutting & cracking. Heavy compaction makes the soil stronger, and ground improvement techniques stabilise the soil so you can build on it.
Some ground improvement techniques that are commonly used in the UK include:
- Lime or cement stabilisation – adding binders to clay soil to make it stronger & less susceptible to moisture
- Geogrids & geotextiles – reinforcing soft ground under haul roads, embankments or pavements
- Vibro stone columns – pushing & compacting soft alluvium or clay into load-bearing columns
- Surcharging – piling fill on top of soft ground to get it to consolidate before you start building
Compactors then get in & make the soil denser & more stable during site prep. But you need to get the right compactor for the soil type & moisture content – sheep foot rollers for cohesive soil, smooth drum rollers for granular stuff, wacker plates for tight spots. & you can’t forget about the tamping tools for compacting the gravel bases when the big plant can’t get in.
Some things to check for on site:
- Specify what density you want & when to test it (nuclear gauge or sand replacement tests at regular intervals)
- Let the weather decide when to stop or slow down compaction – you don’t want to be doing it in the wet
- Keep an eye out for uneven settlement during & after compaction
- Use spirit levels to make sure the ground is flat & properly graded at the formation level before you put on the next layer
You see this all the time on distributor roads where they didn’t do enough compaction – reflective cracking in the surfacing within a year, then you’ve got to do it again, and that’s money wasted, twice what it should have cost you the first time round.
Choosing the Right Equip for Site Prep
Choosing the right plant for the job is a big deal – it affects the cost, the safety & the programme. Using the wrong thing – an undersized pump, the wrong roller, a machine too heavy for the conditions – will send costs up & programme out the window.
Bulldozers for clearing land, demolishing & whatnot. Excavators are essential for digging & trenching. But it’s all about matching plant to conditions, & that’s where experience counts:
- Wet clay conditions – tracked excavators & dozers with low ground pressure; steer clear of wheeled plant that will sink & rut the site
- Granular soils – smooth drum rollers for compaction; GPS-equipped graders for accurate formation levels
- Dewatering – pumps sized to worst-case inflow, not average conditions – you don’t want to be stuck with an undersized pump & flooded excavations
- Machine control systems – GPS & 3D models on dozers & graders reduce rework, improve accuracy & cut survey costs on big earthworks schemes
Common mistakes to avoid:
- Leave plant selection until the last minute & just hire whatever you can find\
- Hire the cheapest option rather than the best one for the job\
- Don’t consider the access requirements for heavy machinery when you’re laying out the site
It’s vital to keep an eye on the weather – for site safety & for deciding when to start or stop plant ops. Get the plant strategy right, & you’ll be moving much faster even in the worst UK weather.
Safety & CDM Duties During Site Prep
Safety guidelines need to be reviewed before you even start building. Under the UK’s CDM Regs, clients, principal designers, & principal contractors all have responsibilities that start long before the first physical work on site.
Some common safety risks to watch out for in early works:
- Working near live services – gas, electric, water, telecoms – service strikes are one of the most common causes of serious injury on UK construction sites.* Unstable excavations – those trench walls in granular or waterlogged soils that are just begging to give way
- Plant-pedestrian interface – you know, those times when a digger is lumbering around the same spot as your workmates on foot
- Contaminated land exposure – things like, you know, skin contact or inhaling crap when you’re digging up an old factory site
- Temporary works failures – when that rickety scaffold or shoddy prop system gives way and everyone’s in a world of trouble. Mainly because some prat forgot to check the design or construction properly
A site-specific construction phase plan has to take early ground and access risks seriously. Proper planning and sequencing of the site prep work makes a lot of these hazards go away – or at least makes them a lot less likely to occur. That’s the goal here: to plan for the risks rather than just sort them out as they come along.
Health & Safety Exec are very clear about this: if you haven’t identified and planned for those early works risks, then you haven’t done your job under CDM. A site prep checklist is a great way to ensure you’re being safe and compliant from the get-go.
Common Failure Modes in UK Construction Site Preparation
Here’s a quick run-down of the most common ways UK civil engineering projects get caught out during site prep. Watch out for these:
- Shallow or poorly targeted site investigation – you get the old “we just put a few boreholes in and assumed that was enough” scenario. Or, you know, no investigation at all because you thought some bits of the site would be “straightforward”
- Optimistic assumptions about drainage – thinking that the site will just sort itself out, or that you can put in a dodgy drainage system that will be fine until later. Yeah right
- Under-designed haul roads – 150mm stone with some geotextile may get you through the summer months but come winter and it’ll be a complete disaster
- Ignored ecology windows – you know, getting a head start on clearing the site in April without having bothered to do the nesting bird surveys, then getting a stop-work order
- Inadequate utility surveys – relying on the statutory plans and not doing any GPR or trial-holes. Then, inevitably, you hit some hidden high-voltage cable in week two
- Urban infill site with unexpected sub-surface obstructions – old basements, foundations or redundant services that you didn’t spot in the desk study. Now you’re stuck with a bunch of piling or excavation delays
- Over-reliance on desktop information – just assuming that your desk study is enough without actually getting out there and checking things on the ground
- Pressure to save pre-construction budget – trying to shave a bit off the pre-construction costs by cutting back on ground investigation or site enabling work. Then, of course, you’ve got to pay three times as much later on
- Failure to coordinate between design and site teams – designers just assuming that their plans will work on the ground without actually checking with the site team. If only they had talked to each other…
Every one of these failure modes could’ve been avoided with some basic, up-front investment in proper site preparation. The pattern here is crystal clear: spend a little cash now or spend a whole lot more later on.
Case Snapshots: When Site Preparation Goes Wrong
Snapshot 1: Mixed-use development on a former industrial site in the South-West. The estimates for utilities, contamination and archaeology came in between £180,000 and £320,000. Then, of course, they found out about all the asbestos and the extra utilities that had been missed and the costs started to skyrocket. Proper early investigation might’ve saved them a significant whack of cash and avoided a whole load of reactive spend.
Snapshot 2: Former gasworks remediation in North London. The Victoria Quarter site at Barnet needed some serious remediation and civil engineering work on contaminated land – including some contiguous piling, asbestos removal and extensive soil treatment. It all added up to a £16.3 million programme that took 130 weeks to complete. The independent ground investigation and some proper value engineering all helped reduce the risk and save some cash. Without that early investment, it would’ve been a whole lot more expensive
Snapshot 3: Highway scheme runs into sulphate-rich ground. The contractor did a pretty good job of identifying the sulphate-rich soils but still managed to fall foul of them – requiring some design changes to the buried concrete. The contractor ended up owing an extra £343,000 and an extra three weeks on the programme. The condition was unforeseeable, given the site information – but a bit more thorough pre-tender GI might’ve flagged the risk early on and let them design it out or at least factor it in properly.
A few common lessons stick out across all three. Namely:
- Early, independent ground investigation saves money and programme time. Every time, no exceptions
- Contingency for unknown contamination or utility diversions is essential, especially on brownfield or industrial sites
- Client tender documents have got to provide detailed site information so that contractors can make a fair, accurate bid
- The cost of proper site prep is always less than the cost of sorting out all the surprises that come up later on
Designing a Robust Site Preparation Strategy
Proper site prep just minimises risks and unexpected delays, really. Translating all this into a practical strategy means getting the right activities at the right project stages:
- At the feasibility stage: Get the desk studies, preliminary ecology surveys, and contamination screening done. Identify any big problems early on
- At planning : Do the full-site investigation, topographical surveys, utility mapping and flood risk assessments – then feed the results into the design.
- At detailed design: Get the final details sorted for our drainage design (both the temporary and the permanent type), plus the haul road, and what work needs to happen before we can start building. Get the key subcontractors – like the ones dealing with earthworks, drainage, and traffic management – involved early on so the plans actually make sense and can be built on.
- At pre-start: Hold a meeting with your team specifically about site preparation before we start, and actually walk around the site with them. Don’t let any physical work begin until we’ve confirmed that every single part of the plan is in place.
Build in some actual milestones for site preparation into the project schedule and tie them to payment and go/no-go decisions. If the guys doing the GI report aren’t done, or the utility diversions aren’t locked in, we shouldn’t start mobilising yet.
Use a proper checklist for site preparation, covering off on things like:
- Site investigation done and GI report signed off
- All surveys have been done, reviewed, and approved
- Utility diversions have been confirmed and sorted out
- Access points have been designed, signed off and built
- Temporary drainage is in place and working as it should
- We’ve got proper erosion controls in place
- The CDM construction phase plan has been issued
- We’ve got the right equipment on site and checked over
A site that’s actually got every part of the plan nailed down is the solid foundation that every successful project needs.
Key Takeaways: The Cost of Cheaping Out on Site Preparation
In the UK civil engineering scene, the “savings” we get from cutting back on site preparation are always dwarfed by the costs of delays, overruns, fines, and damage to our reputation later on. The numbers are clear, the case studies are consistent, and the lesson is always the same.
- Invest in proper site investigation – it’s the cheapest insurance we can buy on a construction project. The cost of soil testing, ground investigation, and checking for contamination is a tiny fraction of what it costs to fix problems after the fact.
- Plan out drainage and erosion controls properly from the beginning. Don’t wait till we’ve already got a problem on our hands – by then its too late.
- Get the access route right from day one. A properly built access route keeps the project on track, and keeps the neighbours happy.
- Choose the right plant for the job, not just the cheapest option. The right equipment for the soil and the conditions keeps productivity high.
- Treat site preparation as a must-do on the project schedule, not some nice to have on the budget.
Solid site preparation is the foundation of safety, programme certainty, and commercial success on every project. Its what separates the winners from the ones that crawl over the finish line late and over budget.
Before you even price up a new tender, or get to that pre-start meeting, take a good hard look at your site prep strategy and challenge every assumption. Because the cheapest fix is always the one you plan for before construction starts – not the one you scramble to come up with when you’re knee-deep in problems on site.