The liquid limit test of soil is a laboratory test used to measure the liquid limit of soil and its consistency when it is wet. This test is a part of atterberg limits test with plastic limit test as the other part.
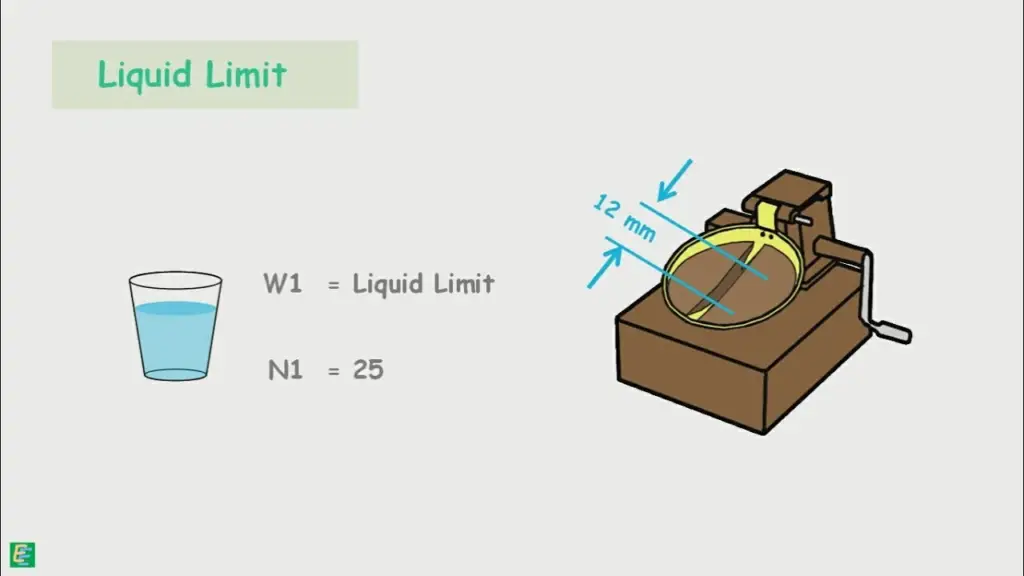
Liquid limit is defined as the water content at which a soil changes from a plastic state to a liquid state.
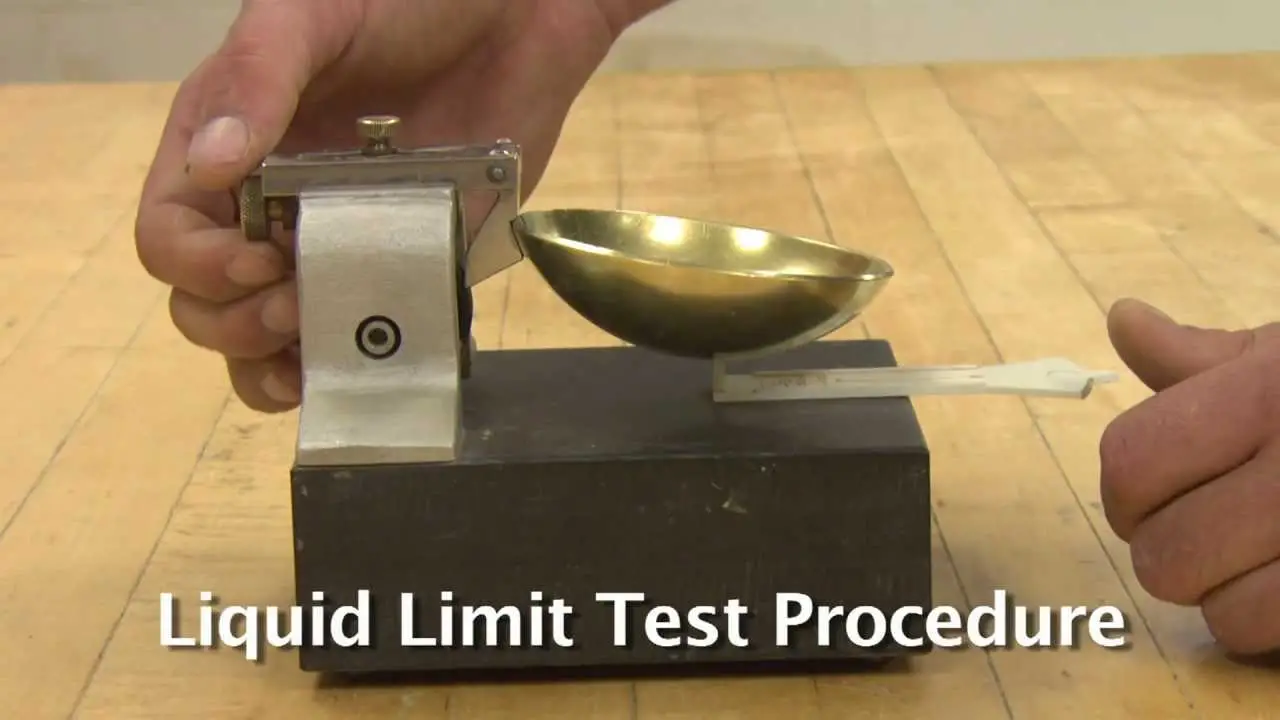
The test is performed by a device called a Casagrande apparatus, which uses a grooving tool to make a groove in a soil sample and then measures the number of blows required to close the groove with a sliding device.
What is liquid limit of soil?
The liquid limit is an important property of soil, as it affects the soil’s shear strength and compression behavior. It is commonly used in geotechnical engineering to evaluate the engineering properties of soil for the design of foundations and slopes.
What are Atterberg’s limit of soil?
Atterberg’s limits are the boundaries defining the limits of the plastic and liquid states of soil. The limits are determined through laboratory tests and are used to classify the soil based on its consistency and behavior.
The four limits defined by Swedish scientist Albert Atterberg are the liquid limit, plastic limit, plasticity index, and shrinkage limit.
These limits provide important information about soil behavior, such as its shear strength, compressibility, and the degree of shrinkage or expansion it undergoes when wet or dry.
Understanding Atterberg’s limits is essential for soil classification, foundation design, and construction planning.

Apparatus Required
The apparatus required for performing the Liquid Limit test on a soil specimen using the Casagrande Method include:
Like Us on Facebook!
- A Liquid Limit apparatus (Casagrande apparatus) which consists of a metal crank with a grooving tool, a cam and a metal cup.
- A grooving tool
- A metal cam
- A metal cup
- A soil specimen
- A spatula
- A ruler
Procedure:
- Take a soil specimen of approximately 25g and place it in the metal cup of the Casagrande apparatus.
- Adjust the crank of the apparatus so that the grooving tool is at the bottom of the cup.
- Rotate the crank and make the first groove in the soil specimen by pulling the grooving tool along the soil.
- Release the crank and let the cam lift the cup until the two edges of the soil specimen just touch. This is known as the “break” point.
- Make a second groove in the soil specimen and repeat the process for 5 samples.
- Repeat steps 4 and 5 several times to determine the number of drops required to close the groove to a specified distance (usually between 10 to 20mm).
- Record the number of blows for each sample and also take a sample in moisture content container to determine the moisture content of soil.
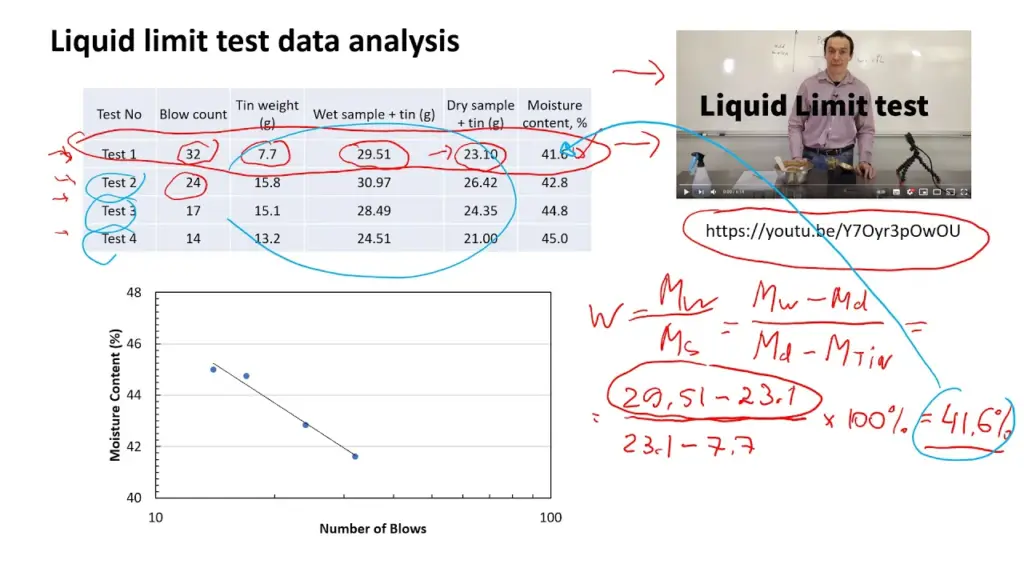
- Calculate the Liquid Limit determining the flow curve. Draw the plot on moisture content vs number of blows on a logarithmic scale. And then determine the moisture content corresponding to 25 blows. This is the liquid limit of soil.
You can also use our online calculator to determine the liquid limit without plotting the graph.
Subscribe Us on YouTube!
Precautions:
- The soil specimen should be air-dried before conducting the test.
- The grooving tool should be sharp and well-lubricated.
- The soil specimen should be homogeneous and of a consistent moisture content.
- The cup should be cleaned thoroughly after each test.
Calculation:
The Liquid Limit is calculated by counting the number of drops required to close the groove to the specified distance and then plotting this value on a graph against the water content of the soil.
The graph is known as the Flow Curve and the Liquid Limit is defined as the water content at which the soil is at its plastic limit.
This value is typically expressed as a percentage of the soil’s dry weight.
| Sample Number | Number of Drops | Moisture Content (%) | Water Content (%) |
| 1 | 30 | 12 | 10 |
| 2 | 35 | 14 | 11 |
| 3 | 40 | 16 | 12 |
| 4 | 45 | 18 | 13 |
| 5 | 50 | 20 | 14 |