Being a landscape contractor, a lot of homeowners ask me how to lay stepping stones on gravel or can you lay stepping stones on gravel? So, I’ve got it covered in my today’s read.
Yes! You can lay stepping stones directly on gravel as it is pretty quick and easy. But in order to have a durable foundation, we recommend laying them in long steps properly levelled with mortar mix. Try to put the mortar up and around the sides.
But that’s not all. I’ve explained in detail all the steps that you must follow in order to achieve a stable and long lasting stepping stones in your next landscaping project. So, let’s delve in:
Beautification of pathways required stepping stone which is an excellent material.
Tools you need
- The following are the tools and material required for the laying stepping stone on gravel.
- Tools:
- The tools required are as follows:
- Shovel or Spade
- Trowel
- Straight Edge Timber or Spirit Level
- Wood Handled Hammer or Rubber Hammer
- Builder Line or Strong String
- Line Pins
- Measuring Tape
Material:
Portland cement, Gravel, Grit Sand or Builders Sand, Stepping stone of desired size and choice.
The given below are 08 different steps for laying stepping stone on gravel.
Layout the Stepping Stone in Longer Steps
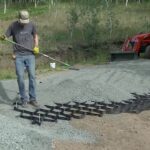
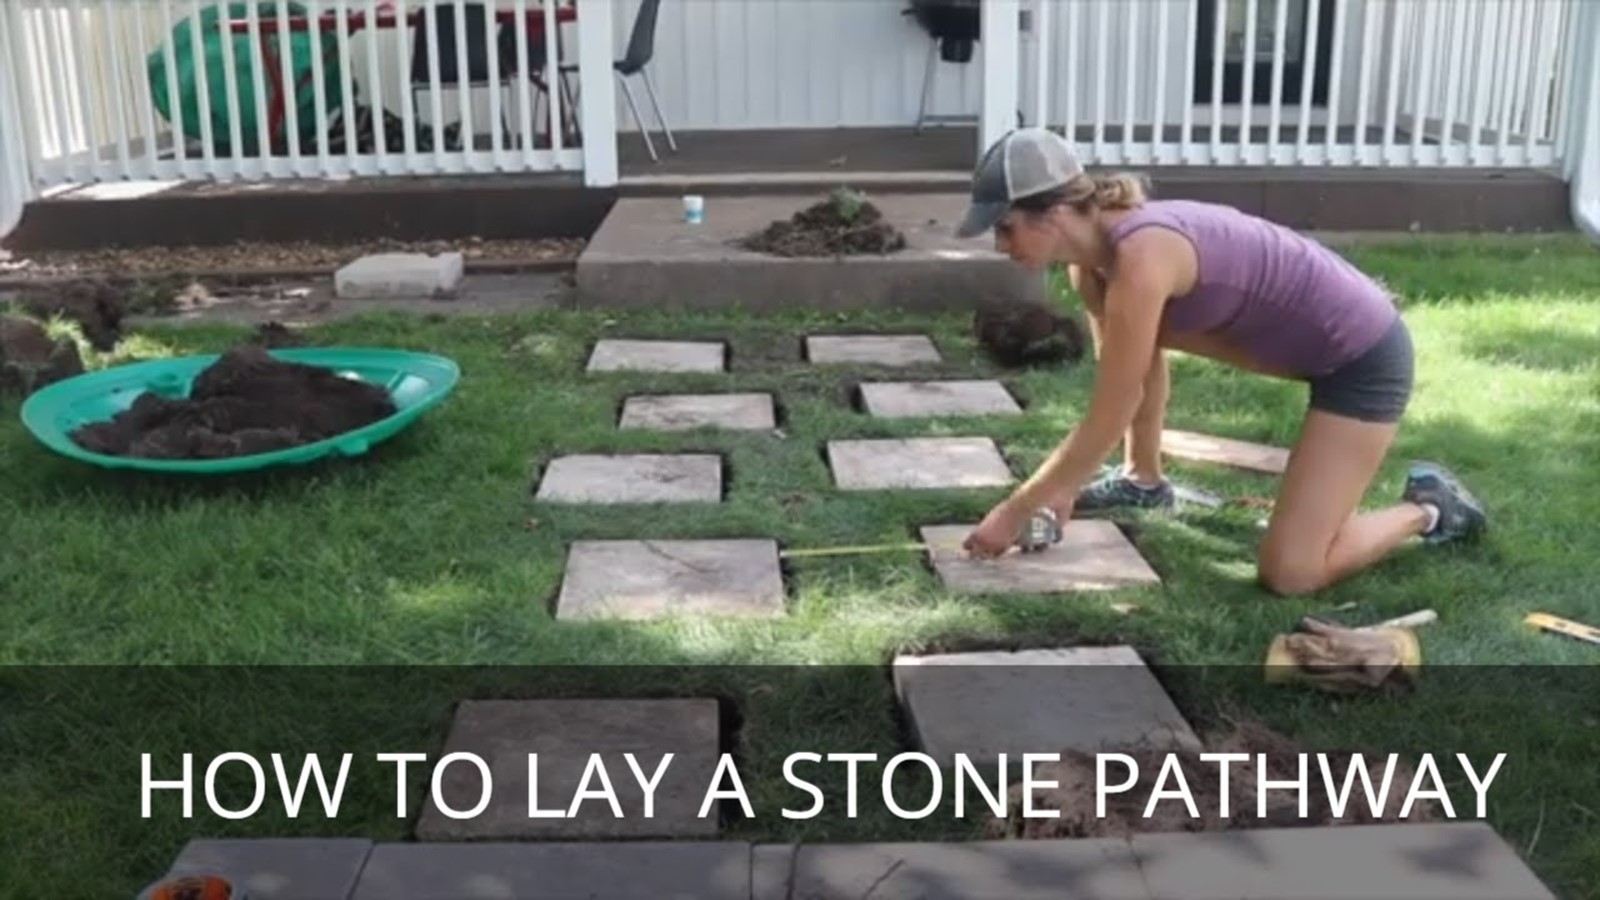
In order to achieve a sample path, stepping stones will be laid on the loose ground. The measuring tape is used to get the equal space between the stepping stone. The main purpose of making this path is to walk safely and conveniently from one place to another. In order to avoid inconsistent distance it is better to use one stride.The personnel using the steeping stone include, children and elderly people so it is feasible that stepping stone be laid close to each other. Gripping of stepping stones can be enhanced by using the PVA Gorilla Glue on the reverse side. This glue prevent the paving slab from sliding off or loosening from the cement bed.
Removal of Gravel from the Section of Previous Slab
When the measurement is done accurately, it is advisable to lay the first and last stone on the requisite path. This will aid in achieving the evenly installed stepping stone on the path. The process begin by the removal of gravel from the two sides of stone slab location and afterwards compress the area.Compaction can be achieved by using metal temper or some other suitable equipment. The compaction results in strengthening of paving path and prevent the whole surface area from sinking.
Layout will be done after laying mortar mix on cleared Gravel Surface
The third step include putting the mortar mix or cement and further evenly compaction is achieved by using the shovel. Evenly distributed mortar bed is achieved by using trowel to level out the concrete or mortar mix.It is beneficial to lay the stepping stone smoothly into the upper surface of concrete or mortar mix once the area under consideration is covered. Lastly after laying stepping stone on the mortar, carefully and gently position it and give it the appropriate position with the actual measurement as in the first step.
Also Read: How Much Slope is Required for Patio Drainage?
Stepping Stone Tapping Down
After laying the stepping stone slab in the desired place, it is required to tap down the surface and level it out. It is mandatory to lay the slab in evenly position bun using the spirit level by tapping the surface.For tapping down the stone, wood handled hammer and rubber mallet is a good option. The best results can be achieved by rubber mallet. It is advisable not to tap the edges of the stepping stone. It is desirable to tap the center of stepping stone. Tapping down the slab results in spreading of the mortar mix, the gaps should be filled underneath the slab to avoid cracking.
Place the mortar around the sides of slab
After tapping the stepping stone, then it is required to fill the mortar matrix around the sides of slab stones to secure them in the exact place. To avoid the slabs from slipping off the mortar, make a buttress and then add three quarters of mortar matrix not more than it from up side of the slab.Installation of line Pins and stringing them on the sides of slab
When the stepping stones are perfectly laid, then installation and positioning of line pins along with string lines can be done for the rest of path. The best way is to put the string lines between the stones.
It is mandatory to keep the line in tight position as much as possible and in line with the stepping stone at both ends. A metal line pin is put into the ground by using the hammer and ensure to lock the string lines to it.
Placement of the Remaining Slabs In line with the Level of the String Lines
After you finish placing the string lines correctly, you can place the remaining stones in a line with it. Do the same process above for each.Once the string lines are placed in order correctly, the remaining stepping stones can be laid in a row with it. The same procedure can be done for each slab. After installing is done, all the stepping stones should be laid in place to make sure that they are laid on the same level surface by using the spirit level.
Replace the Gravel around Them by checking the slab
The final step includes the removal of all the metal pins and string lines. After that gravel around the slab should be replaced. The whole procedure should be done with utmost care because the slab needs 24-48 hours for curing and ultimately gain the strength.s a precautionary measure safeguard the area around the stepping stone. The usage of timber planks and tape is beneficial in this regard. The timber planks should be take off for this wait at least 24-48 hours and the n use the path and walk on the surface.
Tips for best result
Here’re some of the bonus tips that’ll guarantee you to get best results:
Like Us on Facebook!
- First lay the stones as loose on ground to get an idea of how the path will look like.
- Try to keep constant distance between adjacent stepping stones.
- Consider the spacing that’s equally easy to step by elders and children
- You can use PVA glue on the back side of the stone.
- You can begin the lying of stones from first and last to achieve equal spacing.
- Make sure the soil under the stepping stone is properly compacted.
- Use the string line to achieve uniform level as well as distance.